
Wedding Reception Flash Photography: 5 Tips to Get Better Results

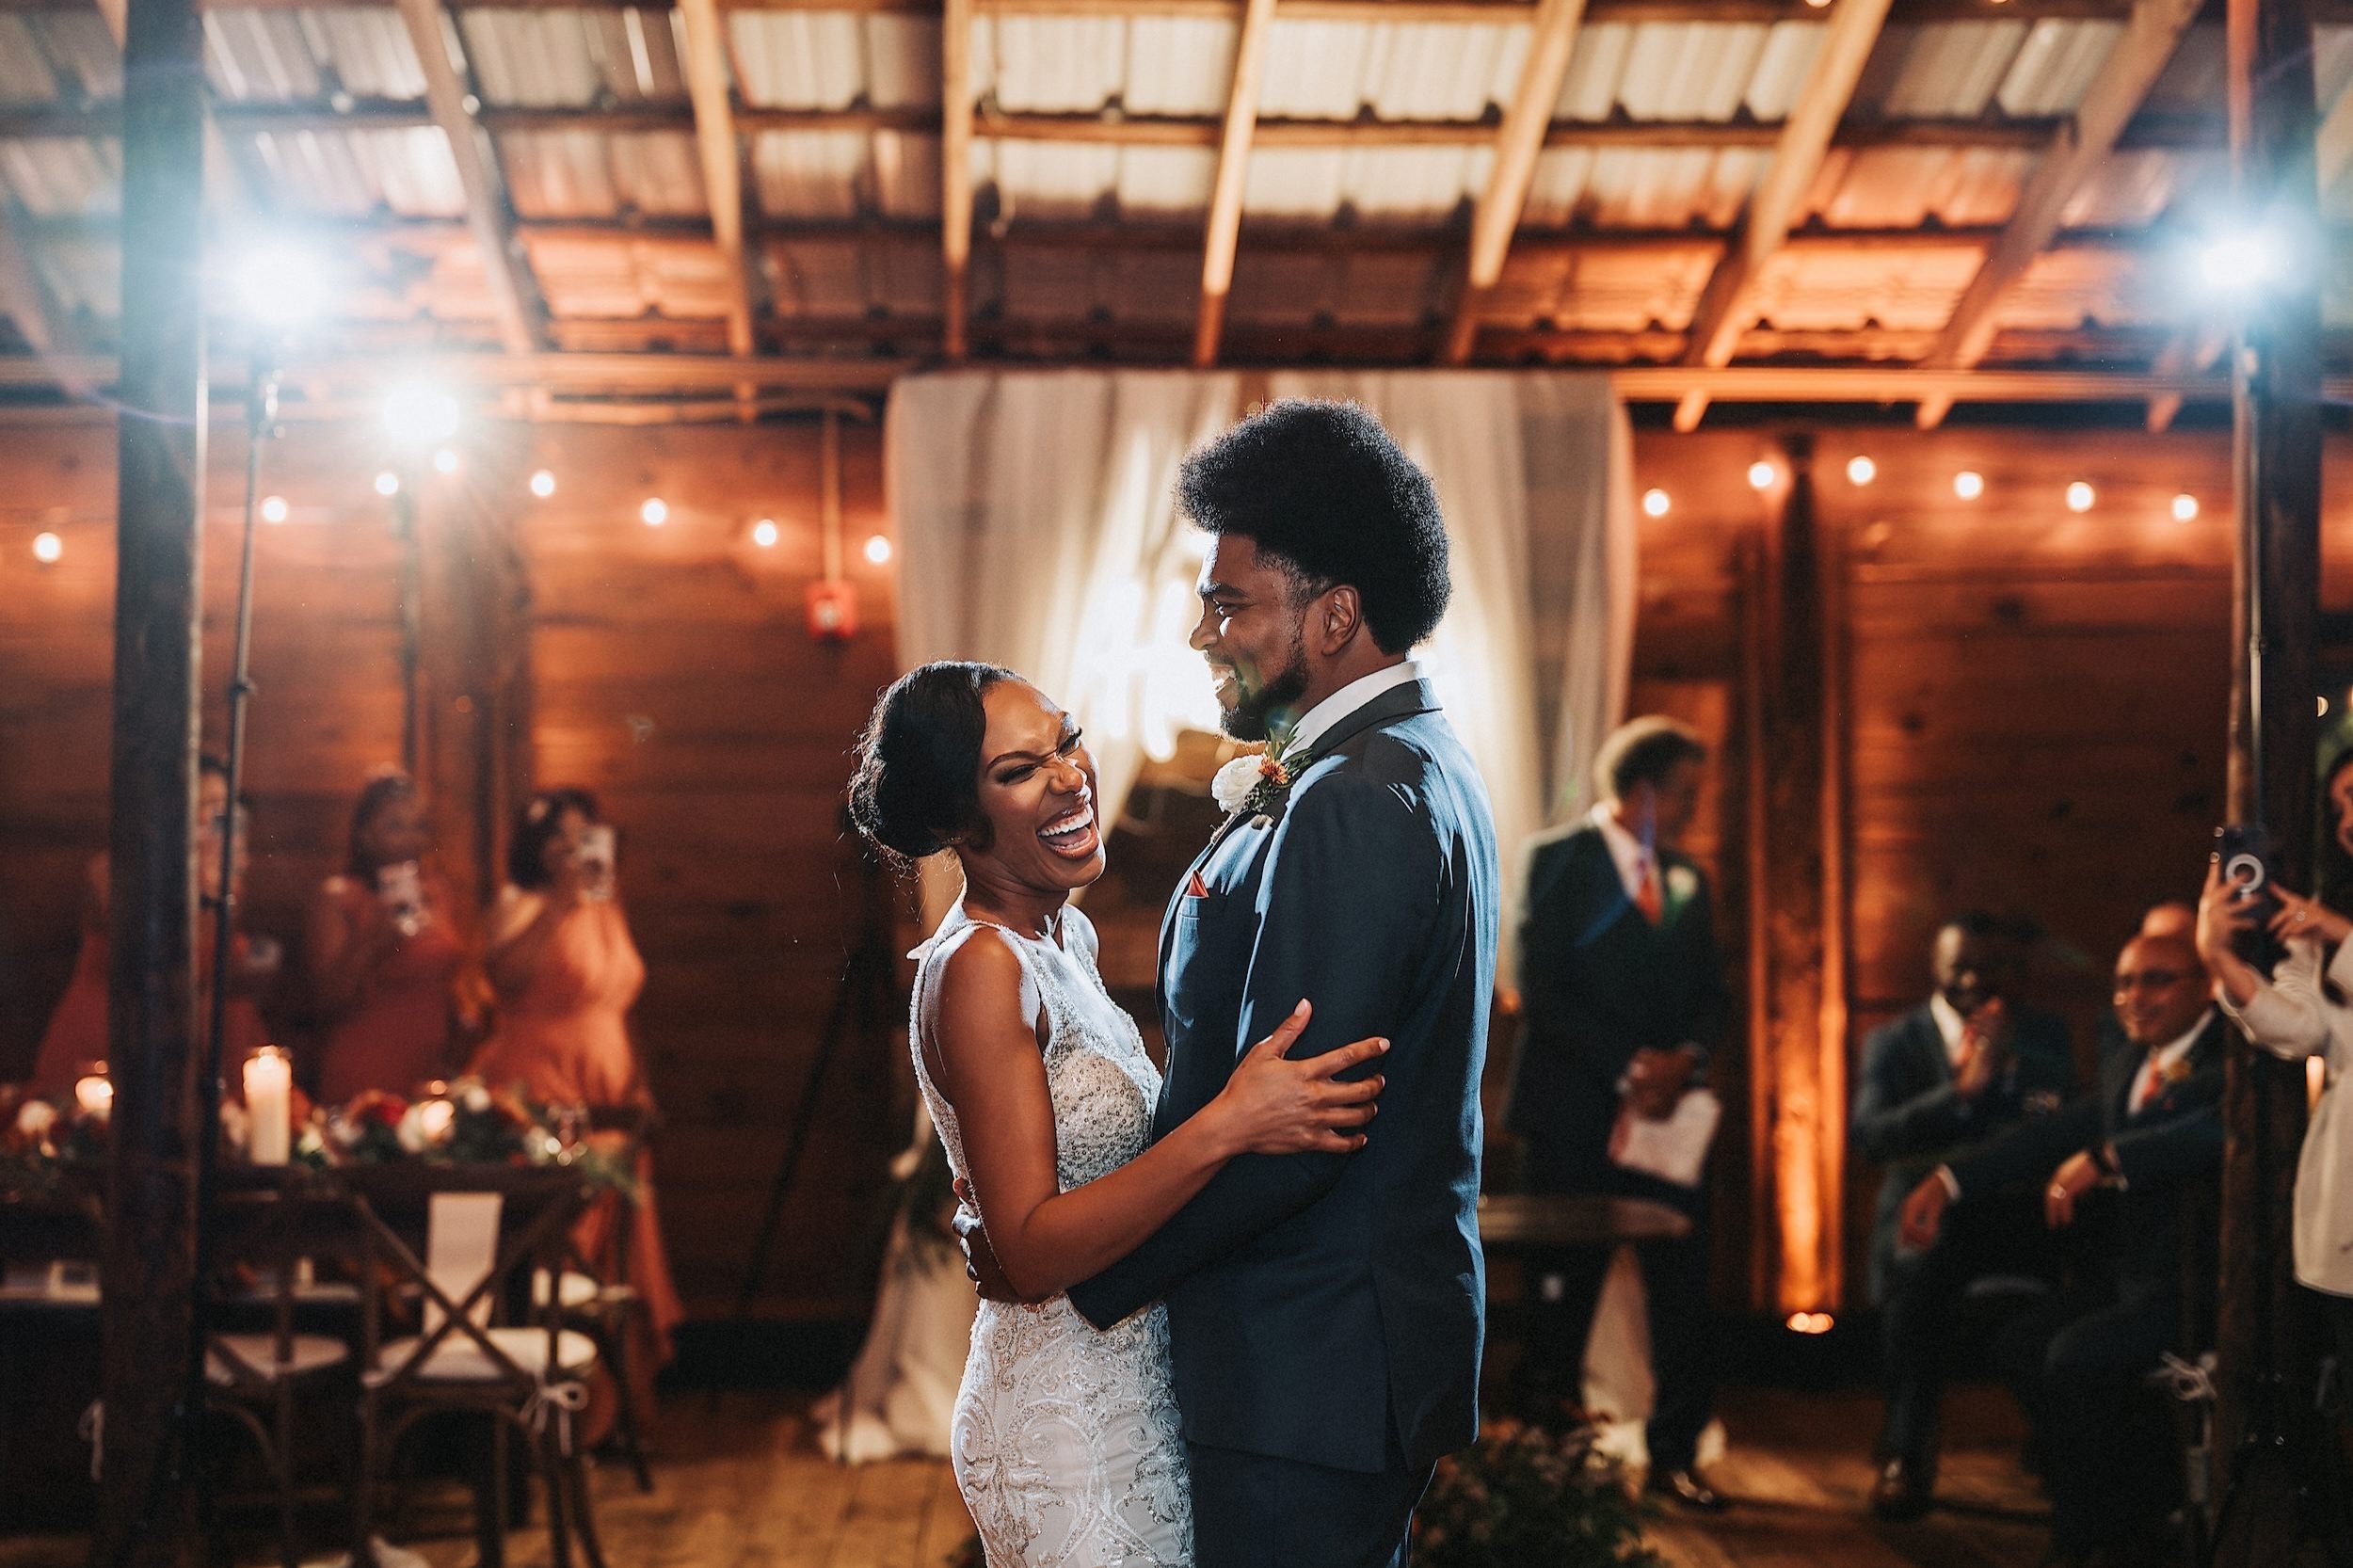
First Dance | Lauren & Ian’s The Cotton Room Wedding, Durham NC
Receptions are on a whole different game when it comes to wedding photography. Ask any experienced wedding photographer about their first reception, and they’ll probably have some wild stories. Because, honestly, it can feel a bit chaotic. You get through the ceremony, the portraits go smoothly, and then—bam—the reception kicks in, and everything changes. The lighting is low, people are moving fast, and suddenly, what worked earlier isn’t cutting it anymore. The lights are dim, people are constantly moving, and suddenly, your usual go-to settings aren’t quite working. It can feel a little overwhelming at first, but with the right approach, you’ll get the hang of it in no time.
Where do I Start?
Reception lighting can be unpredictable, and some wedding venues add to the challenge with high, dark-colored ceilings or mixed lighting conditions. That’s why it’s important to start by taking a close look at your gear—especially your camera settings and flash. While an on-camera flash is a must-have, there are times when even the right settings aren’t quite enough. That’s when a few extra techniques and adjustments can make all the difference.
1. Invest in Flash Modifiers
Flash modifiers are an absolute game-changer for reception photography. I can’t stress this enough. While you can use flash by itself, high ceilings (or even worse, dark ones) will quickly remind you of its limitations. That’s why I rely on flash modifiers, not only to avoid being overly dependent on ceiling bounce but also to ensure consistent, well-balanced lighting no matter the wedding venue.

MagMod MagSphere - Perfect for Wedding Flash photography
Personally, I’m a huge fan of the MagSphere, a flash modifier by MagMod. The moment I used it, I never looked back. It quickly became my go-to for flash. It functions like a tiny softbox, and it easily attaches to my Godox V860II for a seamless setup. You can even explore other options within the MagMod system, like the MagBounce, which directs light over a greater distance, perfect for outdoor wedding venues where there’s no ceiling at all. Or the MagGrid, which creates a more controlled beam pattern, eliminating unwanted light spills for cleaner, more consistent shots.
2. Don’t Be Afraid to Raise Your ISO
A lot of photographers swear by ISO 100 for the best image quality—it’s the “safe” choice. But the truth is, playing it too safe can actually hurt your wedding reception photography. Raising your ISO makes all the difference, as long as you’re not pushing it so high that your photos become unusable.
This is especially true for open dance floors, where the energy is high, and you need to balance ambient light with flash. So when the music kicks in and the beat picks up, I typically set my ISO between 800-1000 to capture the room’s atmosphere while keeping my flash power low for faster recycle times.

My Go-To Setup & Settings for Receptions:
ISO 800-1000 – Picks up background ambient light of the room while keeping noise under control
2 Lenses of Choice:
14mm or 16mm f/2.8 – Perfect for close-range, high-energy dance floor shots. Get in there, bump shoulders, and capture the full atmosphere
56mm f/1.2 – A faster lens for portraits and tighter compositions. Great for intimate moments like the first dance, speeches, or guest reactions, but too tight for the dance floor action
Flash Power at 1/32 or 1/16 – Just enough to light up everyone without overpowering, especially on the dance floor
Shutter Speed: High-speed sync (great with lithium-ion flashes like the Godox V860II)
Shooting Technique:
Now for open dance floor at wedding receptions, I often aim from the hip to capture spontaneous moments and expressive faces. Some shots might be slightly out of focus, but at this close range, you’re going to nail your shots. Just mix it up, get creative, and shoot what feels right!


3. Tell the DJ to Turn Off Some Lights
One of the biggest challenges for wedding photographers at receptions?—DJ lights. While they add energy to the party, harsh or constantly changing lights can make it tough to get clean, well-lit shots for your couple and their guests.
The fix is very simple—Communicate. Politely ask the DJ to dim or turn off certain lights during key moments like the first dance or speeches. Most are happy to help if you explain how it affects your photos.
At the end of the day, your couple deserves the best wedding photos to preserve their memories. They won’t notice the tricky lighting conditions, only the final images you deliver. So don’t hesitate to speak up and take control of the situation.
4. Off Camera Flash when Needed
If the ceilings are too high, there’s no way around it—you’ll need off-camera flash. Black ceilings or super high ones are your worst enemy when using only on-camera flash. Without a surface to bounce light off of, your flash is basically going nowhere. A MagSphere or other flash modifier can help, but sometimes, you need a little more.
That’s when I bring in two additional flashes for receptions, bringing my total to four speedlights of the same make and model. Two stay on my camera, while the other two serve as off-camera flashes, mounted on light stands with cold shoe mounts. I personally use the MagGrip from MagMod as well for its secure and easy attachment.

4 Speedlights, 2 Stands with cold shoe Mounts, 4 MagSphere Flash modifiers (with 2 MagGrids)
Best Off-Camera Flash Photography Setup
Placement: Mount the off-camera flashes high on light stands on either side of the dance floor. Position them either facing the same direction or opposite each other to add depth and dimension to the lighting.
Triggering: Use the same speedlights as your on-camera flash. Set the two flashes on your camera to Master and the off-camera flashes to Slave to ensure they fire in sync.
Light Control: Attach a MagSphere with a grid to both off-camera flashes for better light distribution and direction.
Purpose: This setup fills the wedding venue with additional light, so you’re not relying entirely on your on-camera flash.
5. Use Continuous Lighting
Flash is great, but continuous lighting for wedding photography has its place too in specific situations. Just remember, you can’t keep it turned on the entire reception. It can be distracting for the couple and their guests. I make sure to use continuous lighting for sparkler exits and nighttime portraits where it makes all the difference. A Lume Cube is my go-to for these situations.

Soft lighting on the couple using the Lume Cube
Sparkler Exits: A little bit of continuous light is all you need to make the couple glow without overpowering the sparklers. Too much flash can wash out the scene, dulling the sparklers and ruining the magical ambience.
Nighttime Portraits: I usually have an assistant hold a Lume Cube up to create soft, flattering light on the couple. This gives me control over my settings while keeping the scene natural and romantic.
Why It Works: Continuous lighting is way easier than setting up multiple lights, and it helps maintain the mood of the moment instead of washing it out with harsh flashes.
Get Comfortable, Shoot with Confidence
At the end of the day, the best flash setup is the one that works for you. Don’t get caught up in rigid rules. What matters most is that you’re capturing great moments and delivering photos your couples will love. Whether you’re using on-camera flash, off-camera setups, or a mix of both, the key is to stay adaptable and confident in your approach.
Ask yourself: Are you creating a great final product? Do your photos look good? Are your couples happy? That’s what truly matters.
Simple Flash Photography Course You Need
If you want to feel more comfortable with flash photography in any setting, I’ve put together a course that breaks it all down—no complicated jargon, just real, practical techniques to help you take control of your lighting and shoot with ease. Because when you’re confident in your gear and your settings, you can focus on what truly matters: telling the story of the day through incredible photos.
Capture Breathtaking Wedding Photos!